This is general information about my C Springs house.
Entries will be in reverse chronological order.
Updated: 20221207
------ 2022 ------
20221207: Pane size for garage windows - 10.5 x 37.5 inches.
20220615: Finally moved back in - which was great.
Mattress label.

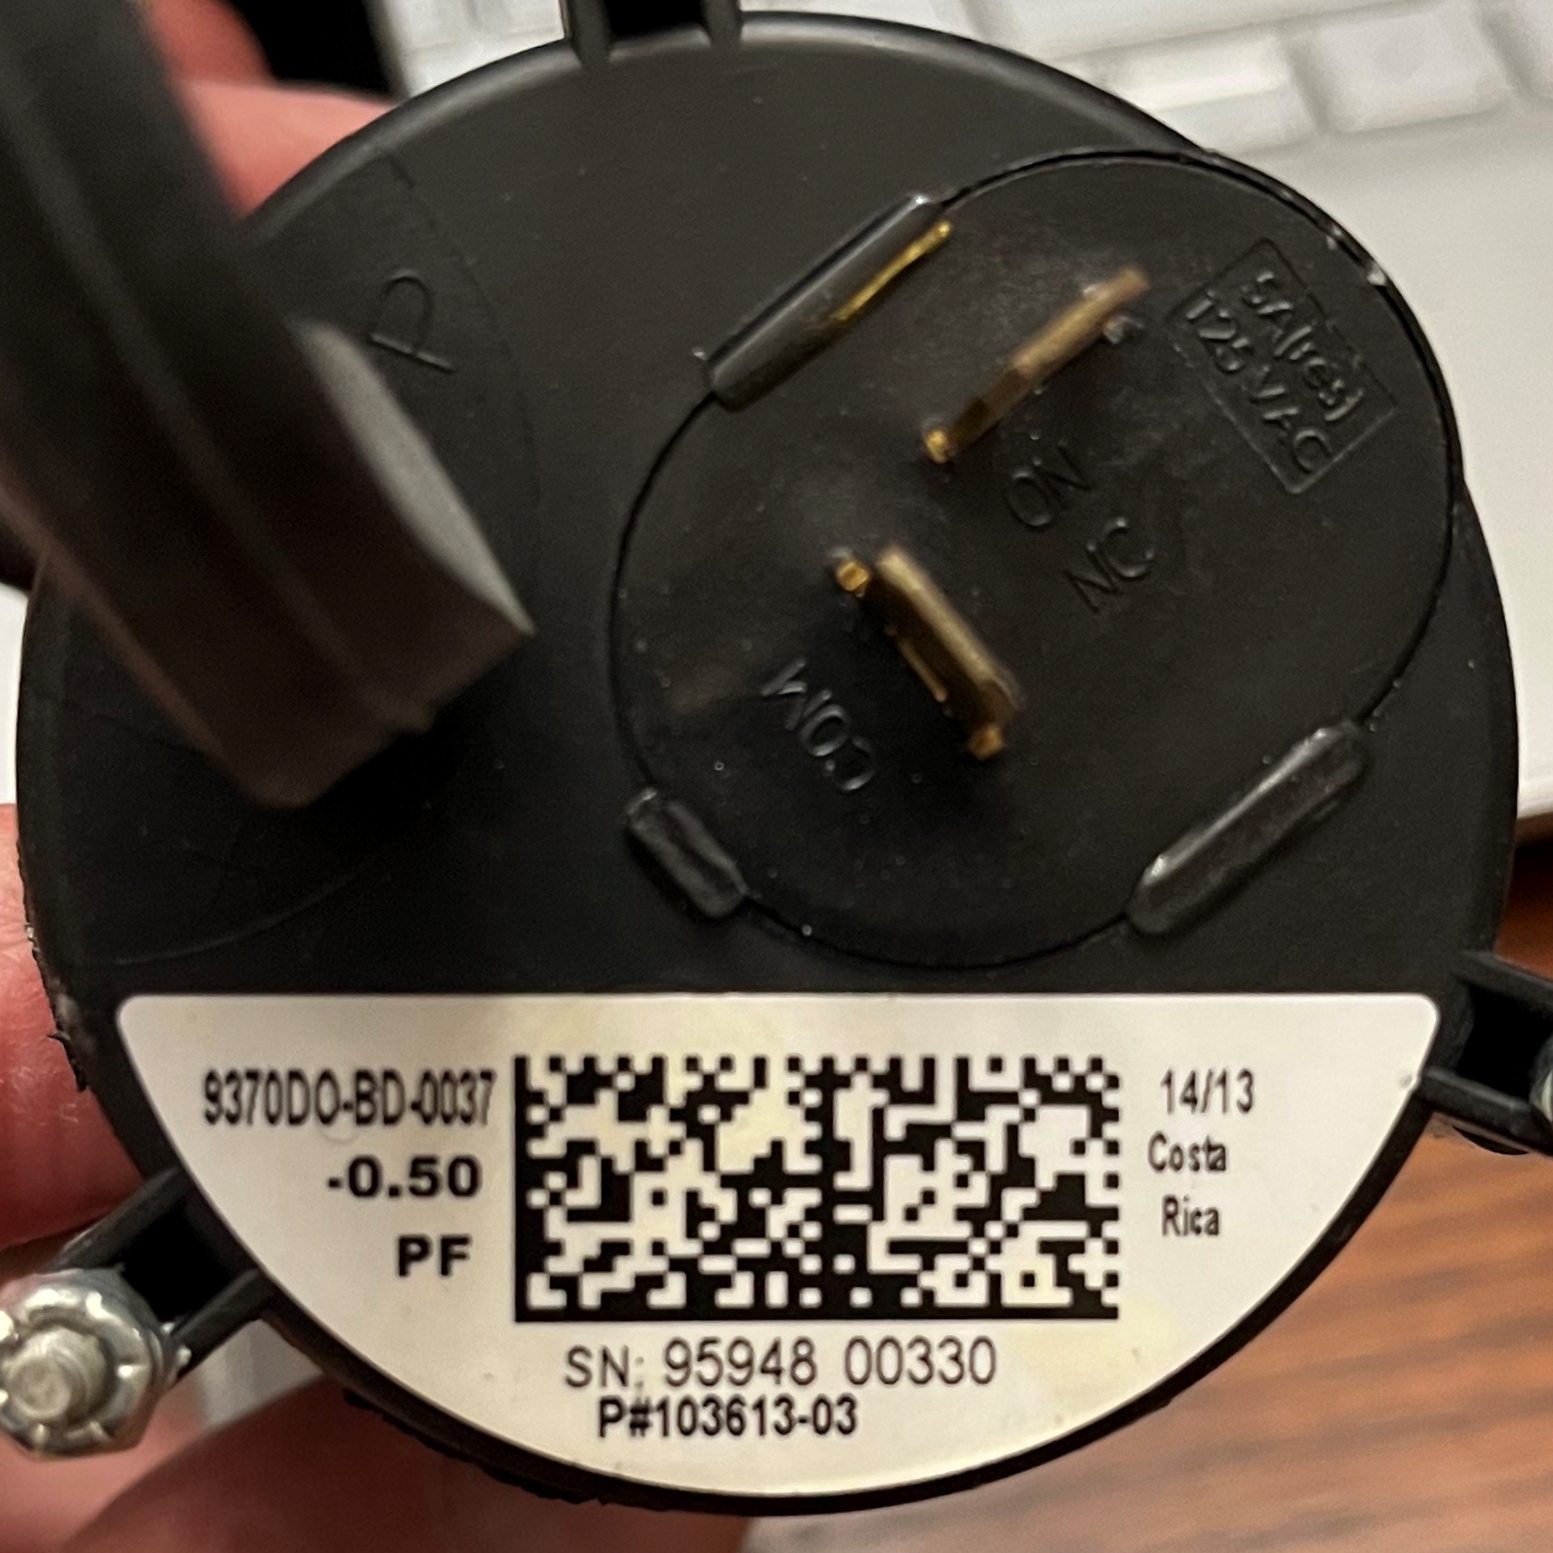
Pressure switch for furnas.
------ 2016 ------
2016-05-27: Window Wells: HVAC Solutions is the recommended company to service the AC and furnace. They have already seen it so it they shouldn't encounter any surprises.

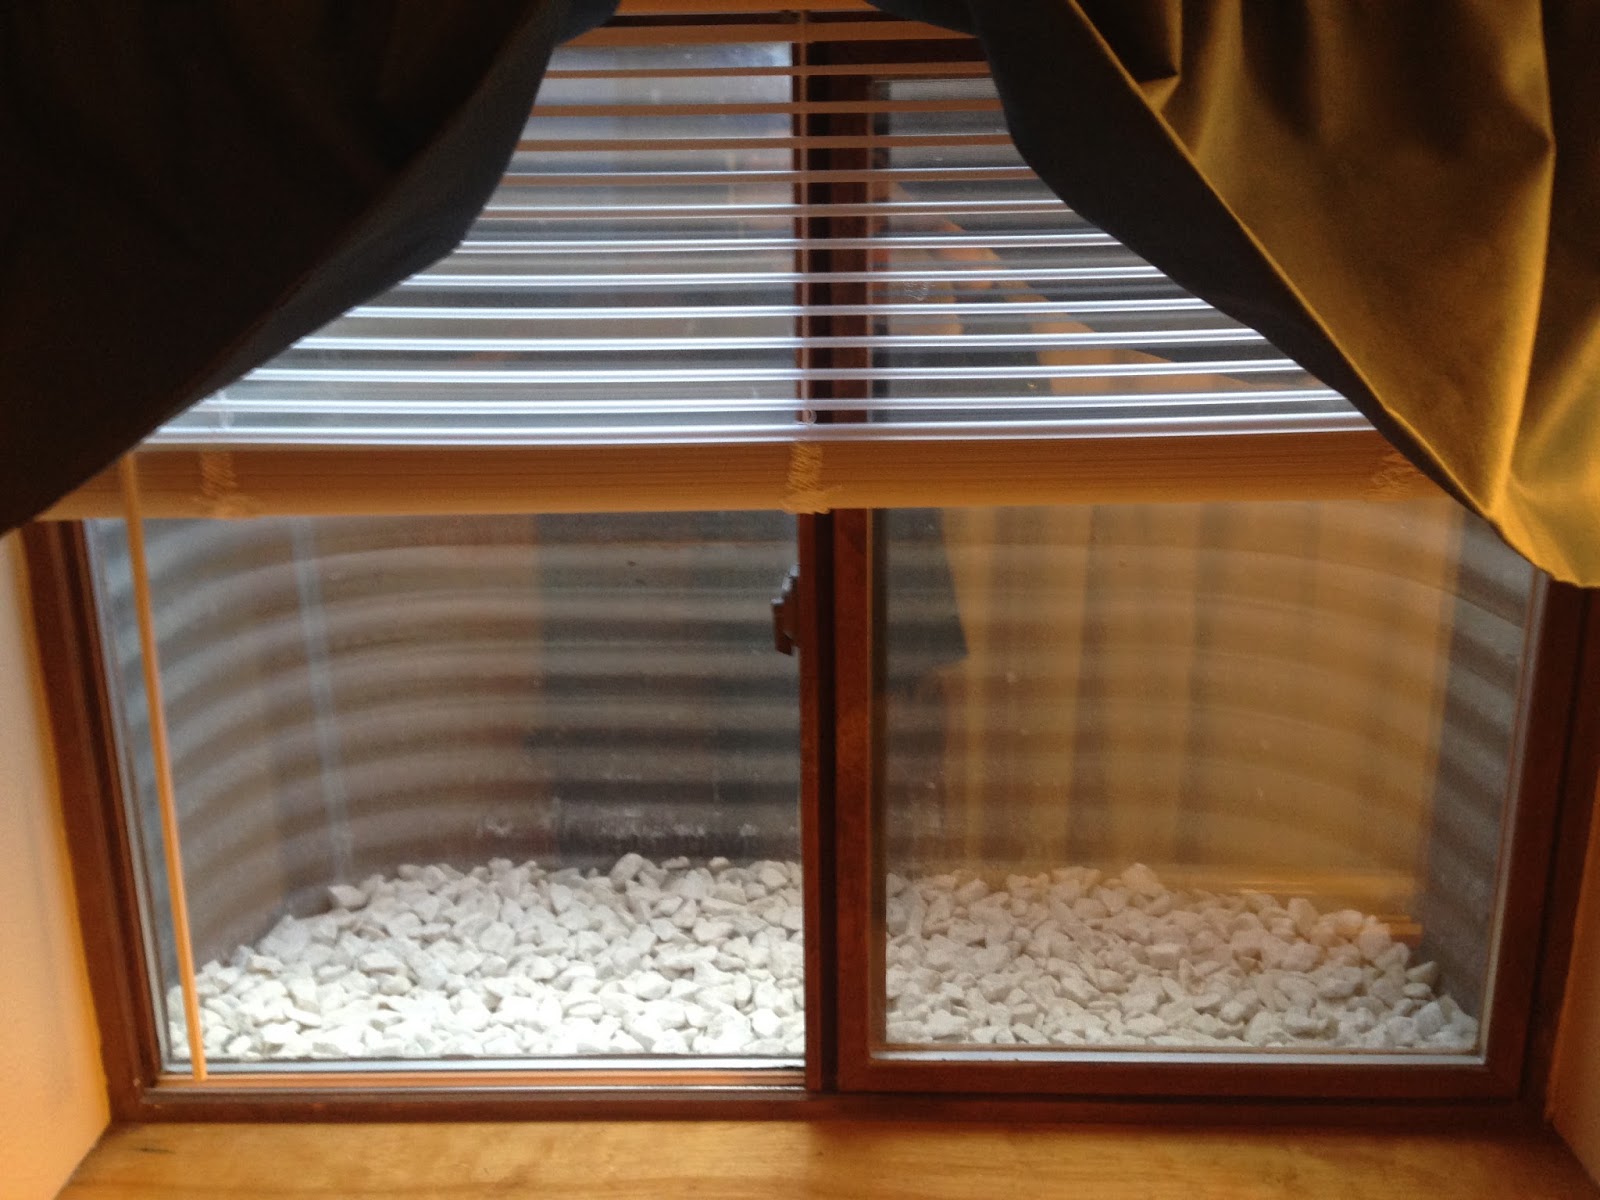
2016-04-29: Window Wells: These hadn't received much attention so I wanted to clean them and add rocks so they are 1) more presentable and 2) better for exits if required. Here are some pics:


2016-03-24 - New Covers (3): I lost my fire pit and air conditioner covers in a bizarre, one-day snow storm. While removing the snow, I noticed my grill cover (included when purchased) was also falling apart. So, I ordered all three, using The Cover Store. Hopefully, these dimensions and products will work well...


2016-03-24 - New Covers (3): I lost my fire pit and air conditioner covers in a bizarre, one-day snow storm. While removing the snow, I noticed my grill cover (included when purchased) was also falling apart. So, I ordered all three, using The Cover Store. Hopefully, these dimensions and products will work well...

Grill Cover: Fits Grills up to 53", Item# 147.TN3
Color: Tan, Size: 53W x 24D x 44H (Update...this was too narrow. Ordered one up to 57")


Air Conditioner Cover: Item# 868.TN3 | Round Firepit Cover: Item# F05.TN3
Color: Tan, Size: 36L x 38W x 46H | Color: Tan, Size: 54" DIA x 25" H
2016-02-14 - New Vanity: Replaced the upstairs second bath sink with a vanity (it was a pedestal sink). I had to reinstall the drain as the first P-TRAP wouldn't seal very well. Most bathrooms have 1.25" plumbing, but this one had 1.5". I converted the 1.25" (from the sink) to the 1.5" directly below the sink and it seamed to work much better. Originally, I made the conversion into the wall, but it was the 1.25" P-TRAP that wasn't sealing. I used Everbilt's 1-1/2 in. Polypropylene P-Trap with Threaded Adapter. Super easy to use!
The vanity was a Naples 31 in. W x 22 in. D Vanity with Right Drawers in Warm Cinnamon with Granite Vanity Top in Beige. Purchased at Home Depot for $628. I had to order a side splash separately, 20 in. Granite Sidesplash in Beige ($25), but it actually matched and fit very well. I expected to make two u-shaped cuts for the water supply pipes (from the floor), but unfortunately, the valve handles were too low, so it turned into two rather large cuts (3" x 6"). Less than ideal but I certainly wasn't going to move the valves higher. I also removed about 2/3 of the back panel. It was the 1/8 inch board and it wasn't worth trying to just cut out a hole. The pedestal sink had a back plate that was anchored into the wall with lag bolts. And those holes just happen to be at a perfect height to anchor the thicker part of the vanity. So it actually is free-standing with the back anchor. Seems sturdy enough. The only thing that kind of bothered me was the tile toe kick went all around the wall (due to the pedestal sink). You don't notice the gap, but looking back, I would probably remove the tile so the vanity could get closer to the wall.
Hardware. I used the Pfister Brea 4 in. Centerset Single-Handle Bathroom Faucet in Brushed Nickel (Home Depot, $98) Big selling point for me...it has a push up/push down drain plug. No pull-up-the-rod stopper stuff. And, I've always thought the trough spouts are a cool look/design, so I thought i'd give it a whirl. I like it very much.


Faucet (l) and finished vanity (r)


The bottom of the push & seal stopper is shown on the left and it was actually really easy to install. Good seals (top and bottom) and just hand-tightened. Very nice. It drops a 1.25" pipe and just below that is where I made the conversion to 1.5" pipes.
I put this project off too long and I wish I would've done it earlier. If I didn't have the initial leaking issue, it would have been finished in a few hours - to include all the mods to the vanity. I'm glad it's finished and I still plan on adding more storage with a wall cabinet.
I put this project off too long and I wish I would've done it earlier. If I didn't have the initial leaking issue, it would have been finished in a few hours - to include all the mods to the vanity. I'm glad it's finished and I still plan on adding more storage with a wall cabinet.
LESSONS LEARNED:
- There are valves that easily convert 1.25" pipe to 1.5" pipe.
- Put more thought into the number of holes on your counter top. 4 or 8 inch makes a difference for hardware, and on this top they were actually at an arc. So a single spigot (like the one I used) couldn't even cover them with a plate. Luckily, you can get hole covers, or a soap dispenser - I used one of each. The single spigot avoids more plumbing to mix the water.
- Consider existing water supply and drain pipe location when picking a vanity. I think I was a bit lucky.
- If you're checking only one supply line but with a single spigot, make sure you go full hot or full cold - the "mixed" water will come out the other line.
Installed shelves on the north side of the garage wall to take advantage of the gap between the garage door rail and the wall. I used Rubbermaid's 70 in. Satin Nickel Twin Track Upright supports. I've used them before and they're easy to install and seem very strong. I like the twin track version because the brackets don't sway left or right. I also made the shelves using 1x4" boards and drywall screws. The total for all material was about $160.
I think pendant lights can add a funky touch and with the high ceilings, I thought they'd go well with the room. I hem-hawed between a brown shade and a multi-color shade. I went with the brown "leopard swirl" because they were larger, fatter and matched the room well. It's a discontinued item and they had two left, so it was kind of an easy decision. When I got home, I promptly dropped one. That made the decision even easier - to go with the multi-color "fire pit" shade. In the end, I bought two separate globes and separate wiring/bracket kits. The brackets with the original brown globes were ridiculously difficult to install. Funny how the breaking of a shade drove me to a better solution. Shown below are the two different globes.


Above left, the original leopard print globe and on the right, the fire pit globe. Below left, the bracket for the brown globe. Notice it attaches from the side - which I thought was way too difficult. Below right is the stand alone pendant kit. The attaching screws come directly out of the face plate which makes it much easier and you can see what you're doing.


Finished project
LESSONS LEARNED:
- Take a close look at the bracket. I will avoid side screw mounts in the future.
- Why can't we just plug wires together? It's the 21st century and we're still using wire nuts. Possible invention.
COST: $40 for fire pit globes, $33 pendent kits and $90 for original globes. Should've been $73 but I successfully made it a $163 project.
2015-03-26 - AC Cover. Ordered an AC cover from the Cover Store. It was model 868 and is 36" x 38" x 46". Fits great. ($39).
------ 2014 ------
2014-11-16 - New Filters. Ordered filters for furnace and furnace humidifier ($43 and $28 respectively. See filter details in General Info below.
2014-11-10 - Rev-a-Shelves! I installed Rev-a-Shelf Tip-Out Trays in the kitchen bath (2), kitchen (2), and master bath (2). I love these things as they change the "dummy" drawer in front of sinks into usable space.
2014-11-09 - New Blinds. Installed blinds on the remaining two larger windows in the living room (east and west). They are the same Hampton Bay Light Filtering Cellular Shades in Flax (color) mentioned below. These were 70.25" x 58.5" and 46.5" x 58.5". ($360 via Home Depot).
2014-10-25 - Toilet Repair. Replaced the wax seal under the upstairs guest bath toilet. I used B and L Plumbing and they were fantastic.
2014-10-28 - New Blinds. I installed 3 new blinds (up/down) in the living/dining room. They were the the two in the dining area and the narrow one in the living room. I ordered Hampton Bay Light Filtering Cellular shades in Flax color. I used the Home Depot function where you can order exactly what you need. These three were 22.5" x 58.5"; 45" x 58.5"; and 45.25 x 58.5". They fit perfectly and were easy to install. ($400 via Home Depot).
2014-10-19 - Landscape. Planted two boxwood shrubs in the southeast corner of the backyard ($25).
2014-10-04 - Miscellany.
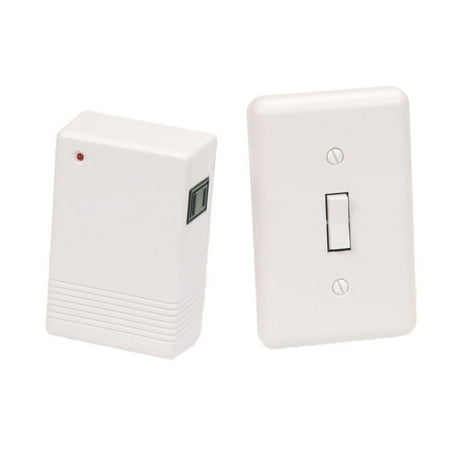
- Installed remote light switches in living room (Home Depot $35)
- Installed hardware on "dummy" drawers in kitchen, master bath and kitchen bath. The hardware was 3" Venetian Bronze Half-Round Foot Cabinet Pull by Liberty (Home Depot $48)
- Replaced loop towel racks with bars in master bath and guest bath. Used Crestfield 18 in. Towel Bar in Satin Nickel. I've used them before and they are very easy to trim to desired length and I've never liked the loop hangers. (Home Depot $57)


Hardware and Towel Rack
- There are two switches above the basement door. I think they are Westek RFK100LC / RFK101LC. The switches and outlet receivers will remain with the house since the switches are attached to the wall.

This is some caulk that was used in the house. It's saved for 1) the brand and 2) the color.

------ GENERAL INFO ------
General Info
- Changed locks on front door and garage door ($105).
- Furnace filter is X6675 (20"x25"x5") or HCF20-16 (actual size: 19 3/4 x 24 3/4 x 4 3/8)
- HOA = Gleneagle Civic Association. gleneaglehoa.org. Treasurer is Treasurer@Gleneaglehoa.org
- Humidifier (attached to furnace) is Lennox HCWB-17 (or HCWB3-17) and replacement filter is Lennox Healthy Climate #35 Water Panel Evaporator, #X2661
- Refrigerator model is: LMX25988ST (support and manual)
- Refrigerator water filter (Type 1, top, inside) is ADQ36006101
- Lawn care recommendations:
- Greener Grass Lawn Care, Inc @ 719.282.3259
- Integrated Lawn and Tree Care @ 719.528.5296
- Spa: Filter is 5CH-352
- Spa: I use Kem-Tek 005 All-in-One Concentrated Chlorinating Granules - seem to work great
- Spa: you can get parts at SpaParts123.com
- Thermostat Manual: Lennox iComfort Wi-Fi
- Vacuum (central) in garage is a Brute XB12119
- There are spare covers for the fire pit and AC in the under-the-stairs closet in the basement
Recommended Service / Maintenance Companies / Utilities
- Disposal: BESTWAY
- Electricity: MVEA (Mountain View Electric Association)
- Gas: Colorado Springs Utilities (CSU)
- Internet / Cable: Xfinity (Comcast) - simply because the house is "cable ready" with them
- Plumbing: B & L Plumbing
- Sprinklers: Sprinklers Inc have worked well for me
- Water: Donala
Sprinkler System
Below is a map of the yard and location of sprinklers. The control unit in the garage can control six-stations, but the yard only uses five (keep 6 set at zero). The numbers on the map correspond to the same number on the control unit. So if you had set "3" for 10 minutes, the sprinklers at the yellow dots will run for 10 minutes.
Here is the Rain Bird manual for the PC100 series. The six-station is a PC-106.

2015-06-07: I purchased an Orbit sprinkler (model 55661)
to replace the K2 in the east gravel (I think it was at the furthest north "3" on map) that no longer turns back to the north
(clockwise). I need to replace it at the base, not just the insert. I wanted to
try this to see if I could do it with minor pain. The K2 is available at
Amazon, but this Orbit was slightly cheaper and I wanted to try the project. Worked great.
------ PHOTOS ------

Master Bedroom (2nd floor) faces east and south. Master bath is to the left.

North Bedroom (2nd floor) picture taken from inside closet. One window facing north.

Northwest Bedroom (2nd floor). Single window faces west, walk-in closet is far left.

Upstairs 2nd bath - newly installed vanity (replaced pedestal sink) and
there is a cabinet over the toilet (not in this pic)

Back of the house (looking east to west)
--------- mm ---------
No comments:
Post a Comment