Showing posts with label design. Show all posts

2024-04-07

Belle and Stars

I bought this for Christmas and K did a little rearrange - very cool.
Also, she put those tiny lights around a painting of mine (BRK) and they fit perfectly. 

I was tired of Belle's side window popping open during flight. The latch would vibrate itself until it could no longer hold. And, if in flight, it slams up pretty hard. I cut an insert from one piece of wood (for strength) and it fit like a glove. However, I neglected to foresee the extraction. I.e., it was too difficult to grab securely enough to pull it out. I just added a little eye screw and I think it's going to work very well.

A gif of the insertion and extraction.

- mm -

2023-01-13

Bishop Castle : 2023-01

Kimberly surprised me with a road trip to Bishop Castle. What a cool place - and climbing around is encouraged! We had incredible weather and helped each other when the trust in rod iron got a little thin. Right when we pulled up, I could tell it was going to be fun. Anyplace where you park on the road and get in for free can't be too bad.

This was the welcome when we parked.

This is the main room - kind of like a cathedral.  The lighting and windows and ceiling were all impressive. We turned out dark, but I think this is a great picture.

Us at the other end of the 'cathedral'.

Us on the bridge which you can see it on the second to last picture. Above right is the tallest spire taken from the bridge.  You can climb all the way to the top and stand just below that metal cone. The bridge we're standing on is made out of rod iron and you can be sure it moves - a lot!

The main room with no humans. The vertical panes can be twisted to let air flow through - very cool. This turned out to be a great shot of the castle. Even if you don't find it aesthetically appealing, you can appreciate the amount of work required to make a castle.

I thought this was a very nice tribute to the Master of creativity. This was a great adventure and I can't thank Kimberly enough!

- mm -

2022-12-13

Repurposed Rolling Bench : 2022-12

I had the old particle board leftover from Workbench Redone and needed a place for my new drill press (in Tools and Putts) so I thought I'd make a rolling bench. I had the bolts, particle board, wheels, power strip and for $30, the 2x4s. I picked up the design from a bench where I bought my drill press (shown below). It was so simple I thought I could knock it out in a day - which is about what it took. So far, I love it.

This is the table that gave me the idea. I didn't add the sides to the lower shelf. It required extra material and I like being able to slide things on/off the shelf.  Also, I could always add them if I think they'd be useful. My version doesn't have the holes drilled for a table vise, but that's why I used 2x4s on their edge - so I can drill them when I have a suitable vice.

- mm-

2022-10-25

Workbench Redone : 2022-10

Once again, I neglected to take any before pictures so you'd have to imagine the comparison. Simply put, it was old, the top surface was warped, and the overall support structure was average at best. To the previous builder's credit, I did use his back supports (those against the wall).

I developed these high-end plans prior to beginning. I had it planned out in my head, but these are great for material lists. They're also handy for proving concepts that are in my head but may not work because I'm overlooking something. The sketch on the right was key for that. I haven't done drawers in awhile so I wanted to make sure the clets/runners were going to work.

I was a little late in the picture taking - the frame is already complete. The difference between the pics is the addition of the drawer runners (right picture). You can't really see it, but I had some adjustable feet (from a storage rack) and thought I'd try them on the forward legs. I don't know if I'll ever adjust them but they worked great, and now I have the option.

Here you can see the elevated feet. For the legs without the adjustable feet, I tried an angled cut (blue square). I'm not sure if this is smart or not, but a smaller surface area seems like it would be easier to level. In other words, you're not depending on a perfect cut along the full span of a 2x4. Time will tell, but it probably is negligible.

Drawers and working surfaces installed. The drawers aren't very deep but they worked nicely because there's a concrete step behind the entire bench. The original bench didn't have drawers - it was just empty space. I thought they'd be a nice addition. As you'll see, the drawers were kind of my favorite part.

Three drawers left a little space against the wall which was annoying but easy enough to handle. The white square shows something I wish I would've changed. I meant to cut the particle board around the 2x4s instead of just the notch. I put some squares in there to fill the gap, but that's not how I wanted to do it.

How do you fix a small gap left over from the other drawers? Just make a small drawer. And why was there a gap? Because I repurposed the drawers in the right picture. I got this little dresser for $12 and even though there was some quality wood in it, it proved to be pretty unstable. The handles are shorter because they suffered some damage when I first tore down the dresser. This is why I was pleased to add drawers to the workbench. The existing drawers saved a lot of time and the dresser didn't go to waste.

- mm -

2022-10-19

Sit Around : 2022-10

First things first...I remembered to take a before picture. I called this a "sit around" because it does sit around and I'm not sure what else it was intended for - probably a computer desk with the old vertical space for the CPU and a pull out shelf for the keyboard. Not sure what the second pull out shelf was intended for since the upper pull out shelf would cover it. It is the board in the right cabinet just below the larger, top opening.

Other than the sides and their respective legs, I was able to completely disassemble this cabinet. I like when that is the case since it's much easier to clean the wood and/or make any repairs or modifications.

Another view of the front and a closeup of the drawer. I converted the pull out shelf to a normal, adjustable shelf. I was pretty happy with the drawer results. I used the original pullout shelf, added some pine sides and back, and fastened the front to so it wouldn't fold down. It was a fold-down front so it wouldn't get in the way of the keyboard - assuming that was the intent.

I pulled these thin slats off so I could more easily strip/clean the sides. They were glued and nailed with very small brads. When I removed them, some damage done by the glue, but I knew it would be hidden.
I didn't want to glue them back on so I wanted to find a simple way to attach them and also add a little accent. I happened to have enough of these black hex-head screws which I think served both intents.

A shot of the back and the sit around in action. The back was nice because it adds rigidity to the piece and was screwed in place - not nailed. I appreciate when people do that because it seems they might be thinking of others down the road. Obviously, little things like this are often done for financial/manufacturing reasons, but it's nice to think there were reasons beyond price.

- mm -

2022-10-02

Cool Container : 2022-10

I was at Goodwill and came across a little wooden box that was pretty beat up.  I had been looking for away to condense the clutter on my desk/table and hide it at the same time.  I thought this could be perfect.

Once again, I failed to take 'before' pictures which kind of defeats the point.  I didn't know how well this little container would clean up nor did I know how I would handle the felt.  I wasn't even going to try to remove it - didn't want to spend that much time on it.  It was a tea box so there were little dividers inside, but those were easy enough to remove.  Just took some gentle tugging.

First, I couldn't believe how well and easily the old finish was removed.  Second, being as careful as possible, the felt gave me very little trouble.  The container works perfectly.  Will I ever get better at taking pictures before I do the work?  I guess time will tell.

- mm -

2022-09-30

Simple Tray : 2022-09

I was tired of saying "a tray would be handy" so I made one with some scrap/leftover wood. The wood I had couldn't make both of the long sides so I mirrored the split - called it an accent. One thing that worked out better than I planned is it holds two dinner plates just about perfectly. I oiled the wood just to add some liquid/food protection. I use vegetable oil which I think works great and is pretty inexpensive.

- mm -

2022-09-22

Easel Art : 2022-09

I've had an easel for years but it is small, light, and not very stable. I thought it was time to buy a studio easel since they seem more sturdy and can certainly hold a larger canvas. After some search, those I liked were about $149-$179 (or much higher if willing to pay). These easels are pretty straight forward and minus a few quirks, seemed like something I could make. So I gave it a whirl.

The easel (above left) is the look/style I was trying to match. The picture on the right is the lumber I started with, but I actually used slightly less.

I made a little sketch using PowerPoint. I usually have the concept in my head, but these sketches help me track the lumber/hardware needed and saves trips to the store.

These were the first sketches. I changed the base to a rectangle and reduced the number of vertical slats. I also planned for a ledge on the upper and lower supports, however I didn't make them. I haven't found them necessary (yet).

Here is the final product - easel mode and folded. I was very pleased it actually folded - which was the intent. I have to loosen the back brace bolts more than I would like, but it still folds. I kind of over-engineered this product so while it's sturdy, it's also a bit heavy. The easel is only connected with bolts and screws - no glue. I prefer to make things which can be assembled/disassembled as desired.

I originally planned on using thumb bolts but with the adjustment slot, that wasn't going to work. A washer would've solved the problem but I couldn't find bolts of sufficient length. It struck me, just bend the washer which 1) makes a handle and 2) doesn't slip through the slots. Bending the washer tight enough stopped the bolt head from spinning. It worked great and was cheaper than pre-fabricated handles.

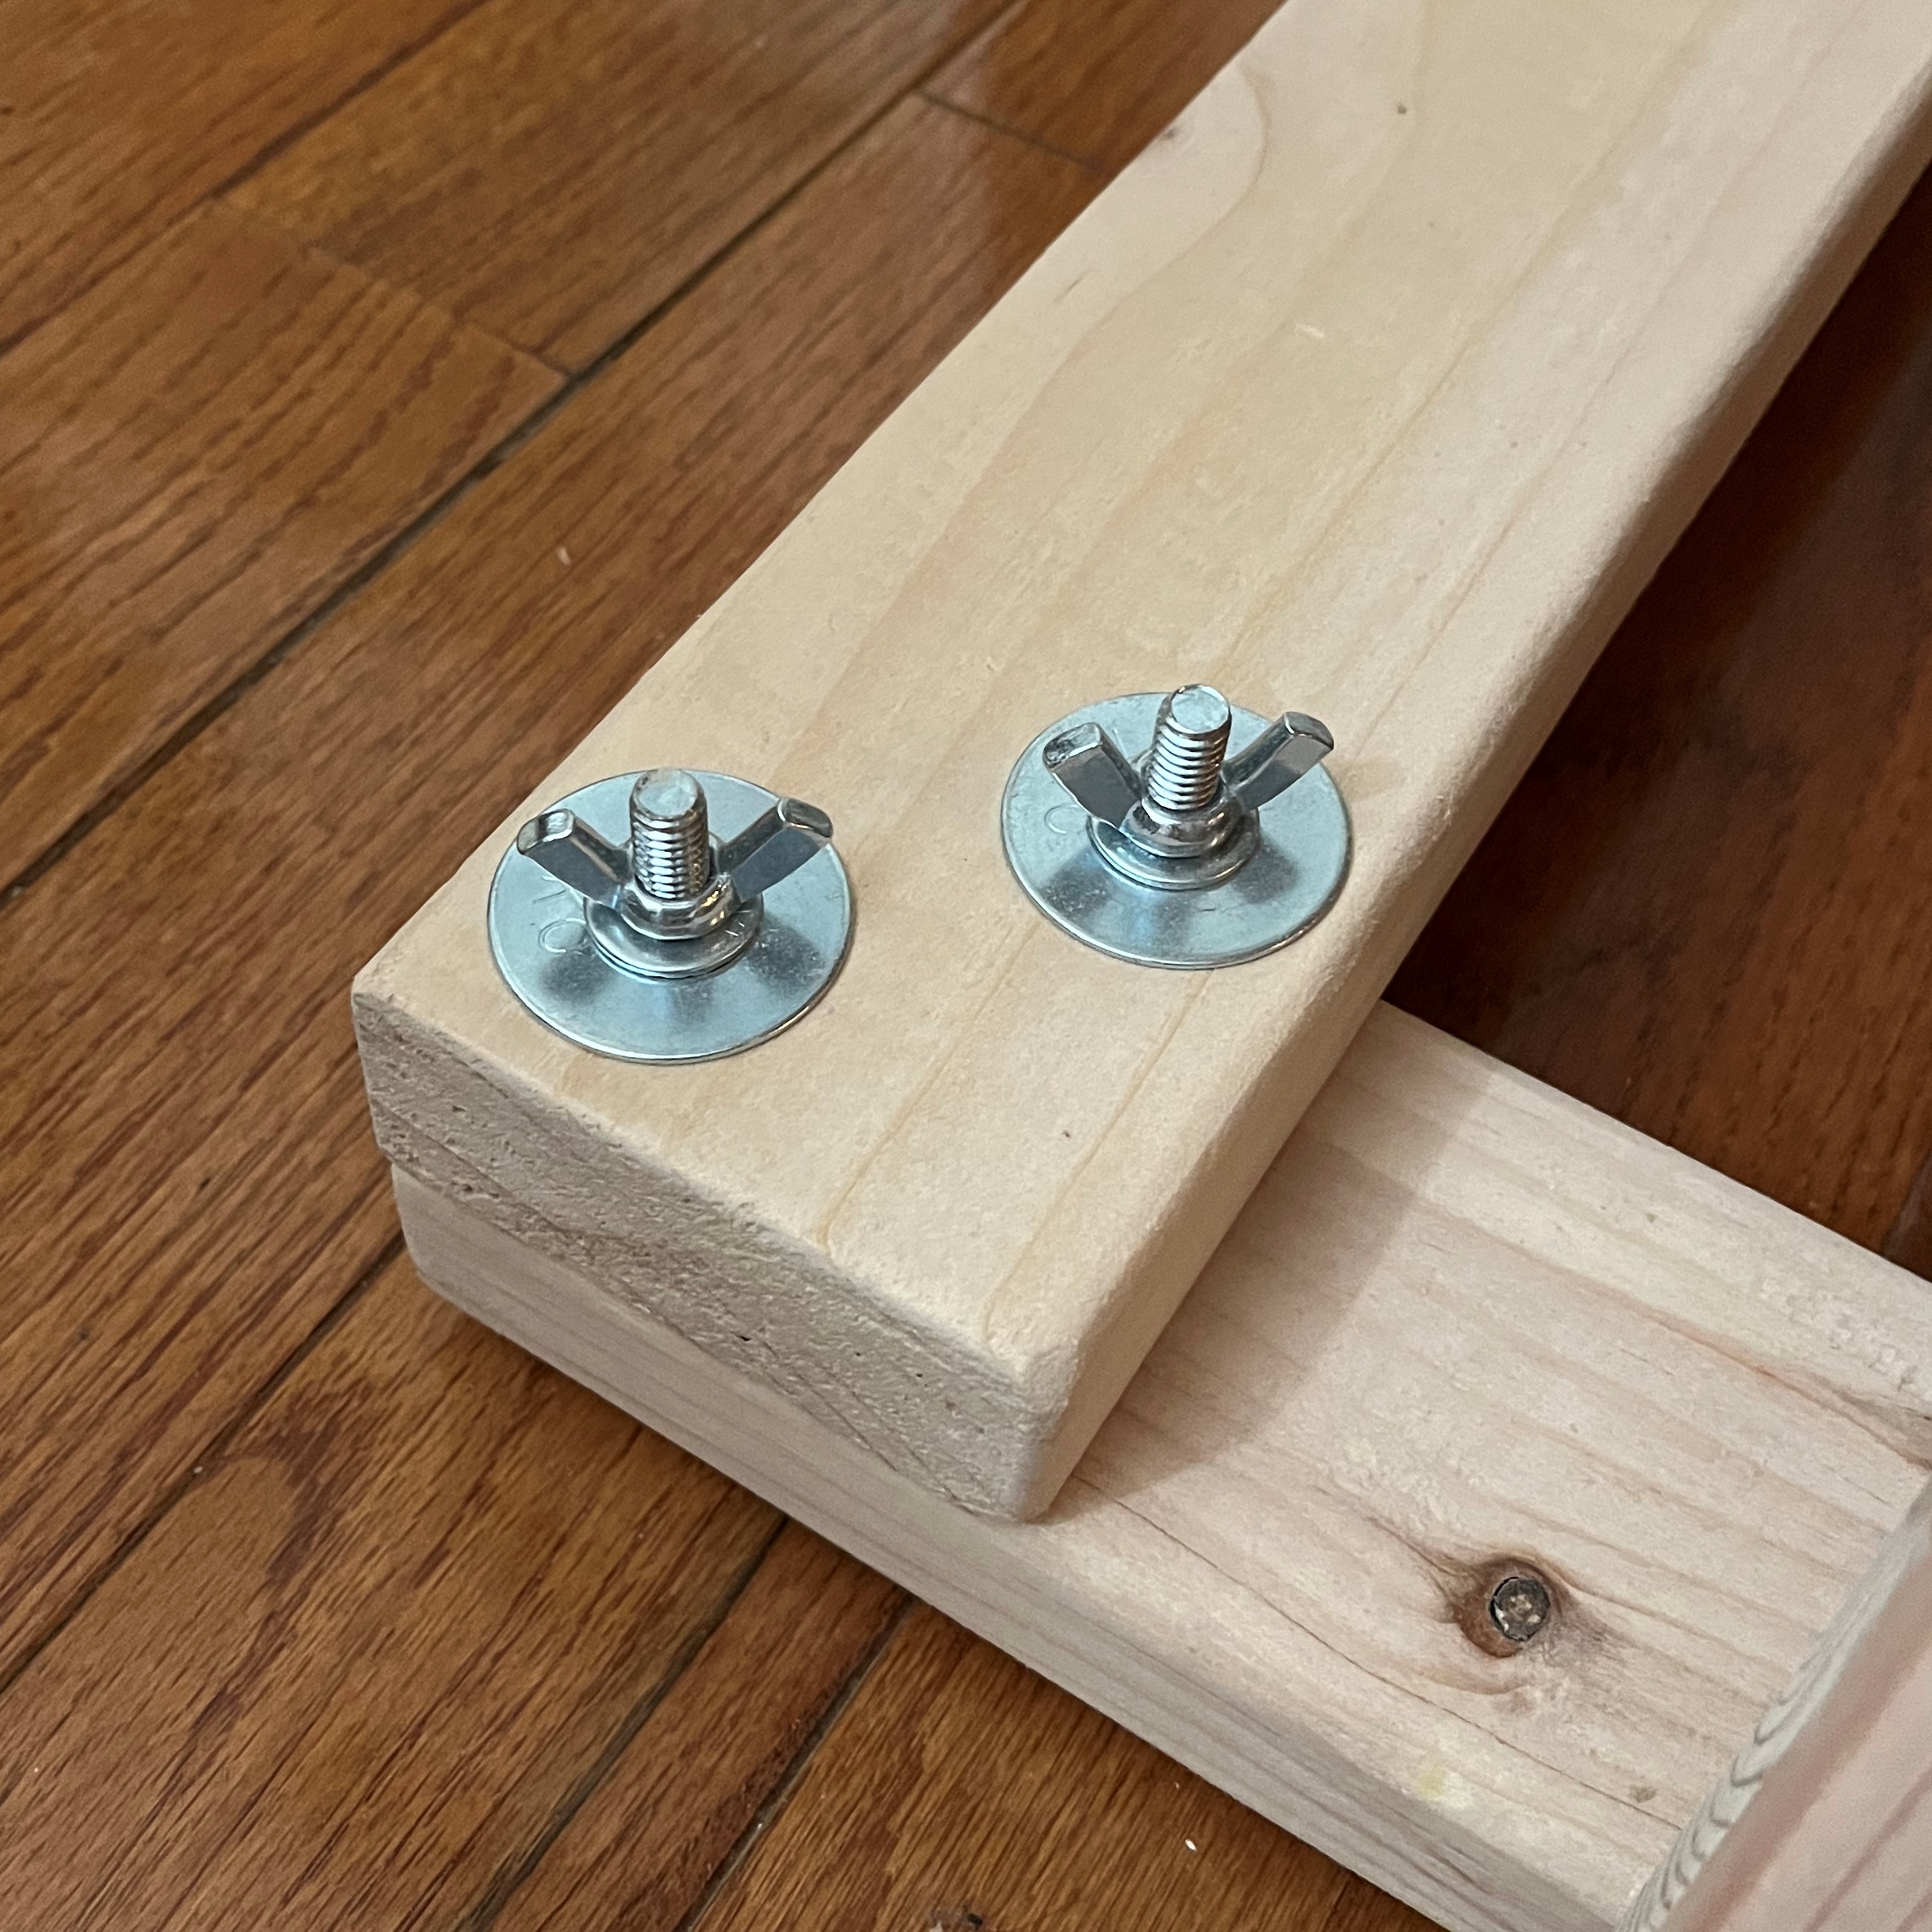
In the spirit of over-engineering, I used two bolts on each corner of the base and heavy duty hinges on the front hinge points. I threw lock washers on the base bolts so they wouldn't spin when tightening the wingnuts. Works pretty well.

One more shot of the easel in use. It's holding the first painting I made on this easel. What you can see (the sky) was painted on my old easel, but I intentionally waited to finish the painting using this easel. It was it's christening of sorts. The painting can be seen here >> K-Bales.

Debrief / things I would change...
1. When folded, the easel could be rolled around pretty easily if I had put wheels at the front/bottom of the base. When in easel mode, the wheels would lift off the ground.
2. The adjustment slot on the right is for the typical range of angles for painting. As opposed to the slot on the left, this limits the overall range of adjustment.

The nice thing about something which isn't glued together is I could make these changes with relative ease. Depending on how much I move and/or fold the easel, I might make the modifications. In the end, I'm pretty happy I tried making my own easel.

Notes for future reference...

- mm -